Refinishing is a practical option for homeowners who want a bolder design change than refacing can achieve. It’s also a more affordable choice than a full kitchen remodel.
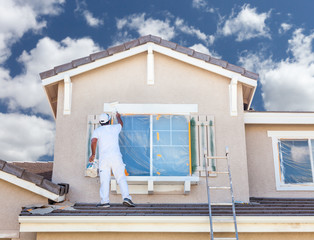
Traditional refinishing involves extensive sanding and can leave your home with dust, noise, and long downtime. N-Hance’s innovative process minimizes these challenges and allows you to stay in your Wilmington home while refinishing your cabinets. Visit Cabinet Refinishing San Jose CA for more information.
Cost-Effective
Cabinet refinishing offers a more budget-friendly alternative to a full kitchen replacement. Refinishing saves 50-70% compared to full replacement, allowing you to transform your cabinetry without spending an inordinate amount of money. It also allows you to retain existing cabinet boxes and layout, minimizing the impact on your home’s value and livability.
Replacing your cabinets is a complete overhaul; you will have to purchase and install new cabinet doors, drawer fronts and hardware, along with possibly re-configuring the layout of the cabinets. This option is best for homeowners who are ready to commit to a completely new look. Depending on the changes you are making, you could change the wood to something more modern or European in style, add or remove doors with glass panes or even completely revamp the layout of your cabinets and kitchen.
Like any remodeling project, cabinet refinishing is an investment. It requires careful planning, meticulous prep work, and the use of high-quality materials to ensure long-lasting durability. Refinishing is a sustainable solution for the environment, using existing cabinets and avoiding hundreds of pounds of construction waste in landfills. The refinishing process typically begins with inspection and selective repair, cleaning, deglossing or light sanding (depending on surface condition), wood filler for damaged areas, quality priming, and multiple coats of low-VOC topcoat.
After a few years, your refinished cabinets may begin to show signs of wear and tear, such as chipping or dulling. If this occurs, it is important to address the issue quickly. You should avoid using harsh chemicals or abrasive cleaning products on your cabinets as they can strip the finish and cause it to fade or discolor.
While refinishing and replacing are both great options for upgrading your kitchen, it’s important to weigh the costs, benefits and your specific goals when making a decision. Refinishing is ideal for budget-friendly upgrades, minor aesthetic improvements, and sustainability solutions. Remodeling is better suited for those with structural issues, want to dramatically alter layouts, or are looking to invest in long-term durability. A professional, experienced company such as N-Hance can help you decide which option is best for your kitchen.
Environmentally Conscious
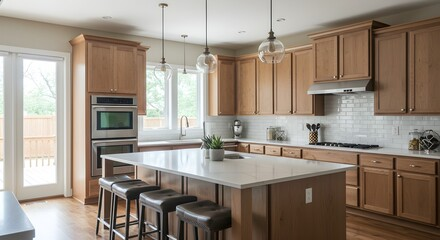
Cabinet refinishing and refacing are both a smart, efficient, and cost-effective way to update your kitchen without spending the money on a full renovation. Refinishing is ideal for existing cabinetry that has solid construction but looks dated, as a fresh coat of stain or paint can revitalize their appearance and make them look brand new. Refacing is an excellent option for cabinetry that’s in good condition, but needs modernized with the installation of new doors and drawer fronts, as well as hardware and a fresh veneer. Both options are also eco-friendly, avoiding the waste and environmental impact associated with manufacturing new cabinets.
The refinishing process begins with cleaning the cabinet surfaces, including the face frames and inner sides of your cabinets. This ensures that all impurities are removed, preventing them from absorbing the stain or paint and causing unsightly streaks or blotches. Then, the surface is sanded to prepare it for the new finish. Next, the cabinetry is stained or painted to your specifications, resulting in a completely transformed look. When complete, the new finishes are durable and able to withstand heat, moisture, and everyday wear and tear.
Compared to cabinet replacement, which can take weeks or even months due to ordering, waiting for delivery, and installing your new cabinets, refinishing is a much quicker project that typically only takes a few days. The shorter timeframe means you can enjoy your refreshed kitchen sooner, while minimizing the disruption to your daily routines.
As an added benefit, cabinet refinishing is easy to maintain. Using a damp cloth or sponge and a gentle cleaner specifically formulated for cabinets, you can wipe down the cabinet surfaces to remove any dirt, grease, or grime that’s accumulated over time. Keeping up with regular cleaning will prevent the need for more extensive and expensive repair work down the line. However, it’s important to perform a more in-depth inspection of your refinished cabinets on a regular basis, particularly around handles and knobs, to catch any damage or areas that may need additional attention before it becomes an issue. This will help to extend their lifespan and keep them looking their best.
Minimal Disruption
Cabinet refinishing involves very little disruption when compared to the lengthy process of replacing cabinets, which can take weeks and leaves your kitchen out of commission during that time. This minimal disruption is one of the main benefits of refinishing and why many homeowners opt for this option, especially if they don’t want to have to live without a functioning kitchen while a renovation is underway.
The cabinet refinishing process typically consists of priming, sanding, and painting. Primer is used to ensure a smooth, even finish, and it also helps to cover any cracks or existing damage. Once the primer is dry, sanding is done to prepare the surface for painting or staining. A light sanding will remove rough spots and imperfections, allowing for a clean and smooth paint or stain application. Multiple coats of the new finish are then applied, and a sealant is often added to help protect against moisture and stains.
Refinishing is a great choice for well-kept cabinets that are in good shape but have been rendered outdated by color or other design changes. It can also be a cost-friendly solution if you are considering a more dramatic change to your cabinets, such as adding glass door fronts or completely restructured cabinet layouts.
The cabinet replacement process, on the other hand, is a more involved project that requires the demolition and installation of new cabinets. This isn’t an ideal solution for older cabinets that are in disrepair or if you want to drastically change your cabinet’s overall look and layout.
While cabinet refacing and refinishing both offer benefits for updating an outdated kitchen, it’s important to weigh your options carefully. Ultimately, both are suitable options depending on your specific needs and goals. For most homeowners, refacing offers the best blend of affordability and functionality while also providing a significant resale return. To learn more about cabinet refacing or to find out how you can transform your own kitchen, contact us today! We can’t wait to show you how cabinet refacing can give your home the fresh update you’ve been dreaming of.
Longevity
Whether you’re looking for a simple refresh or a complete cabinet transformation, refinishing is a long-term solution. With proper care and maintenance, your cabinets can last for 10 years or more without losing their luster. This longevity is a major advantage when compared to other kitchen remodel options such as replacing your cabinets.
Refinishing is a great choice if your cabinet boxes are in good condition, but their color or finish is outdated. It is also an option for older, antique cabinets that you want to preserve while updating their look. This method is not suitable for cabinetry made from laminate or thermofoil, as they cannot be sanded and won’t accept paint.
The process of refinishing starts by thoroughly cleaning the cabinet surfaces to remove dirt, grease, and other impurities. Then, the surface is prepared for new paint by sanding to eliminate any imperfections. Once the face frame is ready, it’s time to apply the new veneer or paneling. Begin with the stiles (the vertical components that make up the face frame) and move onto the rails (horizontal components). If desired, you can also add molding to your cabinetry as well to create a more aesthetically pleasing appearance.
Cabinet refacing is a great option for those who want to change the style of their kitchen but don’t have the budget or time for a full renovation. By refacing your cabinetry, you can achieve a whole new aesthetic at a fraction of the cost of replacing your existing cabinets.
As you work to reface your cabinets, the first step is to remove any hardware from doors and drawers. This can be a tedious task, but it’s important to remove any knobs, handles, or pulls before beginning the process. Keeping all of the hardware in one place can help you avoid misplacing them as you reinstall them later.
The next step is to prepare the cabinetry for refacing by thoroughly cleaning it with a mild degreaser and sanding to prepare the surface. Once the surfaces are completely dry, you can begin to reinstall the cabinet hardware.